To edit an image:
- Select Page>Edit Page Image…
In the Image Editor, the active page of the current ABBYY FineReader document is displayed on the left and the image editing tools are shown on the right.
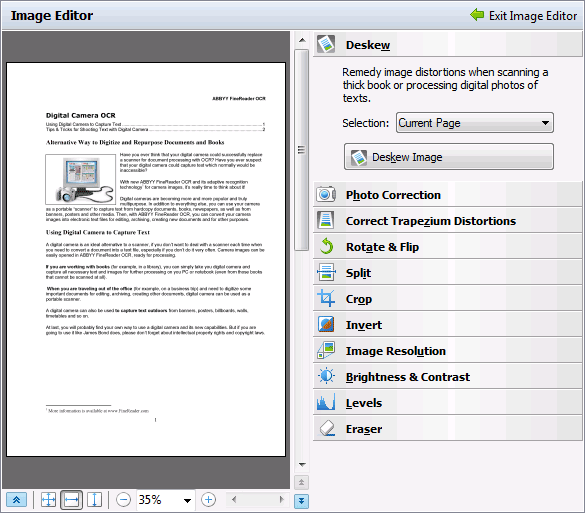
- An overview of the image editing tools:
- Deskew corrects image skew.
- Photo Correction straightens text lines, removes motion blur, and reduces noise.
- Correct Trapezium Distortions corrects perspective
distortions.
When you select this tool, a frame with grid lines is superimposed on the image. Drag and drop the corners of the frame to position them in the corners of the page image. Make sure that the horizontal grid lines run parallel to the lines of text. Then click Correct This Image. - Rotate & Flip rotates the image and flips it left to right or right to left so that the text appears in the normal reading position (i.e. lines are horizontal and are printed left to right).
- Split splits the image (e.g. facing pages) into separate units.
- Crop is used to crop the unneeded edges of an image.
- Invert enables standard inversion of document colors (dark text against light background).
- Image Resolution changes image resolution.
- Brightness & Contrast allows you to select the optimal brightness and contrast values to improve image quality.
- Levels allows you to adjust the tonal values of the
image by selecting the levels for shadows, highlights, and midtones
on a histogram.
To increase image contrast, move the right and left sliders on the input levels histogram. The tone corresponding to the position of the left slider will be assumed to be the blackest part of the image, and the tone corresponding to the position of the right slider will be assumed to be the whitest part of the image. The remaining levels between the sliders will be distributed between level 0 and level 255. Moving the central slider to the right or to the left will make the image darker or brighter respectively.
To decrease image contrast, adjust the sliders for the output levels. - Eraser erases a part of the image.
- Once you are finished editing the image, click Exit Image Editor.