The Scheduler offers you a simple but powerful tool to create/send e-mails, automatically execute actions (like running programs or opening files) and arrange appointments.
| 1. | Go to Tools->Scheduler |
Note: You can reach the Scheduler from SmartBat; it has its own tab in the same window.
Note: The easiest way to get to the Scheduler and set a task is a right-click on any message you want to associate with a scheduled event.
| 1. | Right-click a message |
| 2. | Go to Specials->Remind later |
| 3. | Choose Advanced (or another option for automated settings) |
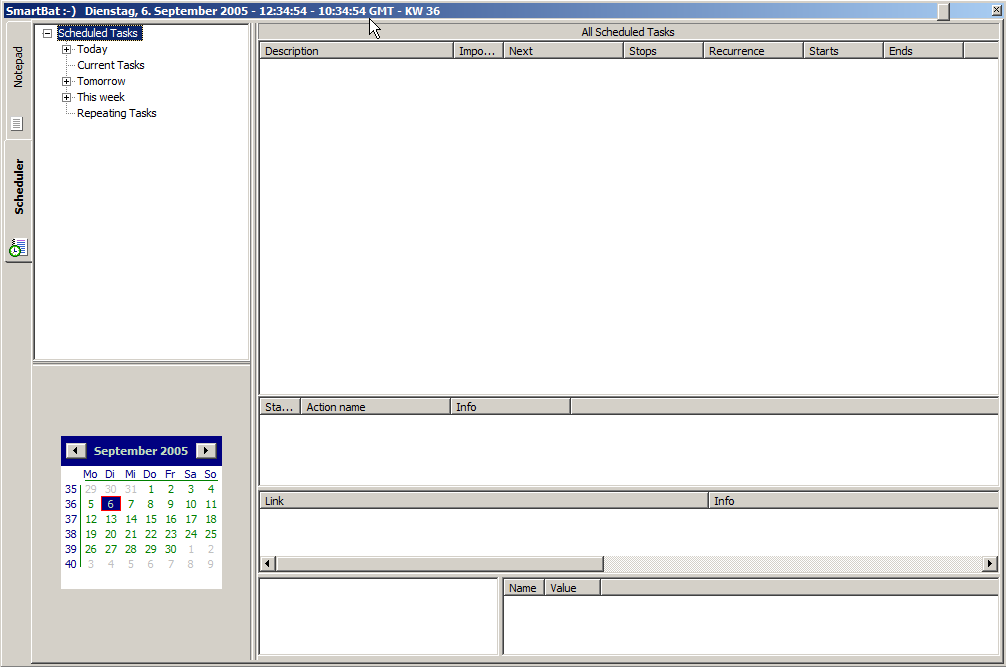
From left to right:
Tree view of set tasks. The plus sign indicates tasks in the sub-category Important.
List of scheduled tasks - gives you an overview of all your tasks, including past ones.
Information panes - the four panes below the task list show details for any selected task.
Calendar - easily pick a date and time for an event to occur.
To add a new task
| 1. | Click the right mouse button |
| 2. | Choose New from the popup menu |
To edit a task
| 1. | Select a task in the list |
| 2. | Right-click to open the context menu |
| 3. | Choose Properties |
General setting
| 1. | Enter a description |
| 2. | Choose a starting date and time |
| 3. | Set the duration |
| 4. | Select a priority |
| 5. | Check Notify me ... and select when The Bat! shall notify you |
| · | Click Notification parameters |
| · | Check and choose an audio file for a notification sound |
| · | Choose the oudspeaker to be used for the sound (computer speaker or other) |
| · | Check and choose repeated sound playing |
| · | Check if the notification window shall take focus |
| · | Check Use as default if your settings shall be the default for all tasks |
| 6. | Check Notify up to ... if The Bat! shall notify you for events in the past (i.e. while The Bat! was not running) |
Note: Priority set to high or highest will sort your task under the Important twig of Today, Tomorrow or This week.
Actions
You can define action to perform when a task starts and when it ends. In both cases
| 1. | Click Add |
| 2. | Choose an action (a context-specific dialogue will open to define further): |
| · | Start a program |
| · | Send/Check mail |
| · | Create/Send message |
| · | Open linked document |
| · | Watch and Send files |
| · | Perform Folder Maintenance |
| · | Refilter messages |
| · | Backup |
To edit or delete an action, select it from the list and hit the appropriate button.
Start a program
| · | Program |
| Choose the program to run. |
| · | Command line parameters |
| Enter command line parameters for the program chosen. |
| · | Application window display mode |
| Choose Normal, Maximised, Minimised, or Hidden. |
| · | Run console application as a detached process. |
| Check this to ensure the newly opened program runs in a separate process from The Bat!. |
| · | Wait for completion |
| Check to let The Bat! wait for the other program to complete its work (i.e. scanning a file for viruses). |
Check/send mail
| · | Choose Check for new mail only, Send Queued message only, or Check and Send mail simultaneously. |
| · | Choose which account shall be used. |
| · | Connect to internet if needed automatically connects to the internet if necessary. |
| · | Disconnect when all sessions finished - check to end your dial-up after the action is performed. |
Create/Send message
| · | Select the account to use. |
| · | Choose addresses for your new message. |
| · | Create your message from a specific template (click Edit) or select a Quick Template. |
| · | Check Attach linked documents if you want need attached files from the original message to be send. |
| · | Select how to send your message, and if multiple recipients get individual messages. |
Open linked documents
| · | Start this action when notification is confirmed |
| · | Search a message in other folders in case it is moved |
| · | Open messages only if it complies with following options |
| Define any flags for the message it should comply to to be opened. |
Watch and Send files
The General tab lets you define where The Bat! looks for files and what to do with them.
| · | In directory |
| Select the directory your files to be send are stored. |
| · | File mask |
| Define which files The Bat! shall use (system's wildcards are permitted). |
| · | Delete the file |
| · | Add extension |
| Useful to keep track of which file was send when (e.g. let The Bat! add a date as extension). |
| · | Move to |
| The Bat! moves the file after sending to another directory. It can also create a new directory automatically. |
| · | Send each file in a separate message |
| · | Skip subsequent actions when no file was found |
| · | Skip subsequent actions when a file was found |
The Mailing tab is the same as for Create and Send mails (see above).
Refilter Messages
| · | Select the account you want to use filters from. |
| · | Select a filter set. |
| · | Select the filters you want to use. |
| · | Select the folders to filter. |
| · | Choose a log view. |
Recurrence
Set the interval for a task to be repeated. When checked you can also choose if and when to stop any repeats.
Note: Only if you check Repeat this event ... the Advanced tab for further options will be visible.
Advanced
If you have set a task to be repeated this tab gives you additional options. Set the interval, start time, day of time the rule is valid.
Using the Cron format you can further refine your rules.
Links
This tab contains all URLs, files and Address Book entries associated with a task. If you made a reminder for a message, the message link will already be in the list.
| 1. | Click Add |
| · | Add a file |
| · | Add an URL |
| · | Paste an URL |
Use the Edit and Delete buttons to edit or delete any selected task.
For contacts from your Address Book act accordingly but use the buttons beside the Persons pane. With an address selected in the pane you can access the contact's information for editing purposes through the Edit button.
Categories
You can define your own categories for tasks (e.g. Business, Family or Taxes).
| 1. | Click New |
| 2. | Enter a Name |
| 3. | Enter a unique Handle |
| 4. | Enter a descriptive text on the Memo tab (optional) |
Any category selected in the list can be edited or deleted by hitting the respective butons.
Related Topics: