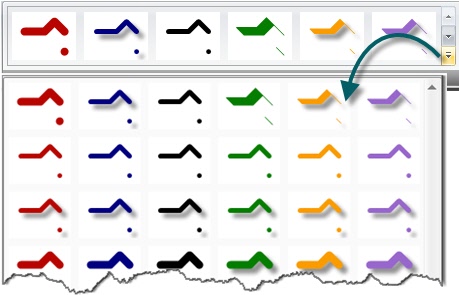
Use the Pen tool to create vector-based, freehand lines. Choose from a variety of pen line in the Quick Style Gallery or create your own.
1.
2. Select a style from the Styles group.
1.
2.
1.
2. -Or-
1.
2. Hold the <CTRL> key to use the eyedropper to select a color from the canvas.
3. Release the <CTRL> key after color selection.
1.
2.
3.
2.
2. Select Styles group > Outline option > Width. Select a width from the menu or click Custom Lines to create a new width.
To change the shape of a pen line, right-click a pen line and select Edit Points. Use the yellow points to change the shape of the line. Select Edit Points again to remove the points from view.
Hold down <SHIFT> to keep the line straight as you draw a vertical, horizontal, or diagonal line.
2. Select Styles group > Effects > Opacity > Select the opacity level or click Custom to enter a specific percentage.
To add a custom shadow, select Styles group > Effects > Shadow > Click More Shadows. Use the options in the Drop Shadow task pane to create a custom look. Click OK.
3. From the popup menu, click Add to Quick Styles. The pen line is now available in the Quick Styles Gallery.Antialiasing is a technique used to make lines appear smooth. Without antialiasing being applied, object edges will appear jagged. The antialiasing option is turned to “on” for all of Editor’s vector-based tools.
2.