When the Automation Wizard dialog box opens in the left-hand side of the window, select one of the available steps. The selected step will be displayed in the right-hand side of the window.
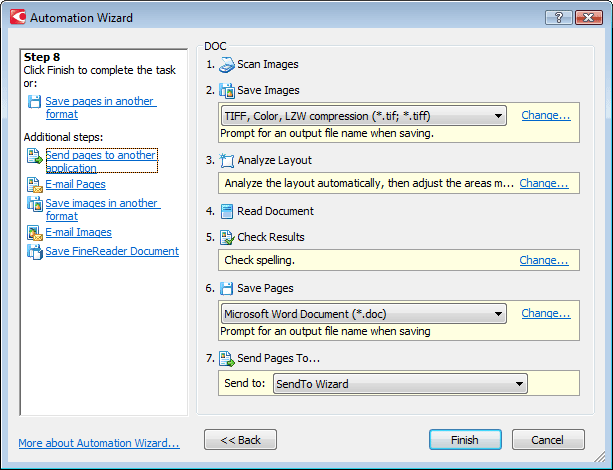
Steps are added to the task with default settings. In order to change a step's settings, simply click Change….
 For details, see
Steps of custom automated
tasks.
For details, see
Steps of custom automated
tasks.
Use Delete to delete unnecessary steps from a task. The choice of available steps depends on which steps were selected previously. That is why not all steps can be deleted individually. For example, if the Recognition step is added to a task, the Page layout analysis step can no longer be deleted from the task. In this case, in order to delete the step, you must first click << Back and return to the step you wish to delete.