Select the Automation Manager command from the drop-down
list at the right of the Scan&Read button, or
Press Ctrl+T, or
Select Automated Tasks>Automation Manager from
the Process menu, or
Select the Automation Manager command from the
Tools menu.
In the Automation Manager dialog, click New.
In the dialog that opens, enter a name for the new automated
task.
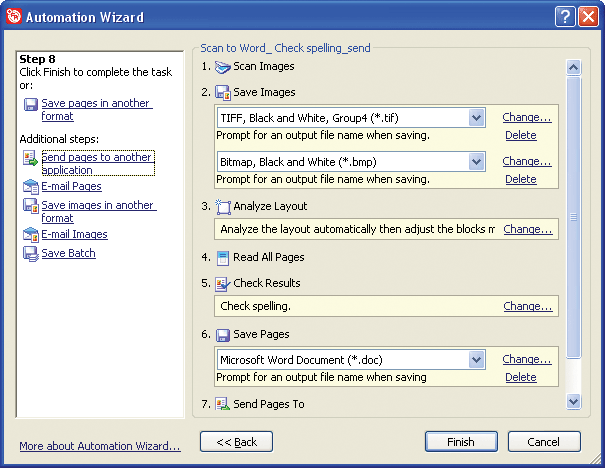
The Automation Wizard will open. The wizard will
guide you through the automation steps and their properties.
The left-hand pane of the Automation Wizard displays the
list of available steps. As you select steps in this list, new
steps may become available or, conversely, some steps may become
unavailable. The right-hand panel displays the selected steps and
their properties.
Select a step in the left-hand pane. The selected step
will be displayed in the right-hand panel.
The property of a step is displayed in a yellow field below. If
you wish to change the default property, click the Change...
link to the left and select a new property.
The saving steps have the Detele link that allows you to
remove an unwanted step from your automated task. Note: The scanning/opening, recognition and page layout
analysis steps cannot be removed independently. To remove these
steps from the automated task, use the Back button.
Once you have added all the necessary steps to your automated
task and selected their properties, click Finish.
The new task will be added to the list of available tasks in the
Automation Manager and to the drop-down list of tasks at the
right of the Scan&Read button.